
Influxdb + Telegraf + MQTT - docker-compose
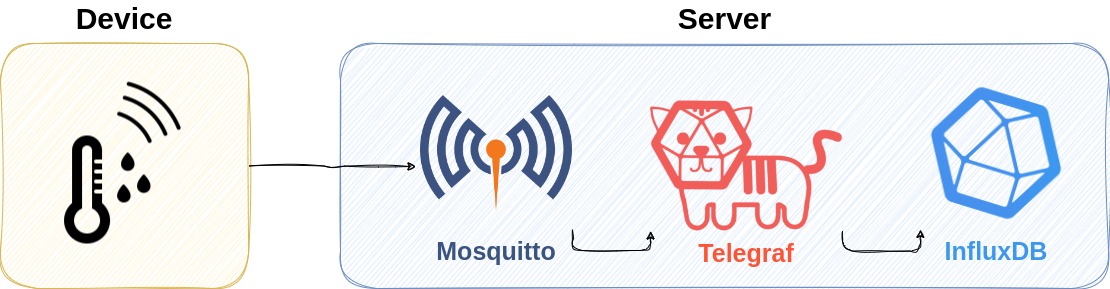
Let’s assume that we have a lot of sensors publishing structured data to an MQTT broker and we want to store this data in a database. A simple way to do that is to use Telegraf (tool from InfluxData) to consume and process the data and store it in an InfluxDB database. In this tutorial, I will explain how to prepare this setup using docker-compose.
For your knowledge
InfluxDB is an open source time series platform. This includes APIs for storing and querying data, processing it in the background for ETL or monitoring and alerting purposes, user dashboards, and visualizing and exploring the data and more. The latest InfluxDB, now includes functionality for Kapacitor (background processing) and Chronograf (the UI) all in a single binary.
Telegraf is a server-based agent for collecting and sending all metrics and events from databases, systems, and IoT sensors. Telegraf is written in Go and compiles into a single binary with no external dependencies, and requires a very minimal memory footprint.
MQTT is an OASIS standard messaging protocol for the Internet of Things (IoT). It is designed as an extremely lightweight publish/subscribe messaging transport that is ideal for connecting remote devices with a small code footprint and minimal network bandwidth. MQTT today is used in a wide variety of industries, such as automotive, manufacturing, telecommunications, oil and gas, etc.
Project structure
Files that you will need to create:
Create docker-compose.yaml
To start this project will need to prepare the docker-compose YAML file to configure the following application’s services:
- Telegraf: This service only needs its configuration file mounted.
- InfluxDB: For the database, we need volumes for data (/var/lib/influxdb2) and configs (/etc/influxdb2). This service also needs the default Port 8086 open.
- Mosquitto: This service needs the configuration file mounted and the file containing the authorized users and respective hashed passwords. Important: The password.txt is not read-only, but it should! The reason that is not read-only is for the user to change the content (it will be explained below). This service also needs the default Ports 1883(MQTT) and 9001(websockets) open.
docker-compose
1 |
|
To run this setup, execute the following command:
sudo docker-compose up
InfluxDB Service
After starting the docker-compose services, the InfluxDB will be accessible at http://0.0.0.0:8086. Here, you will be able to explore the data, but also configure the Telegraf integration. So, to get the API token for Telegraf you will need to follow the next steps:
Load Data > Sources > Search for MQTT > Create a new configuration
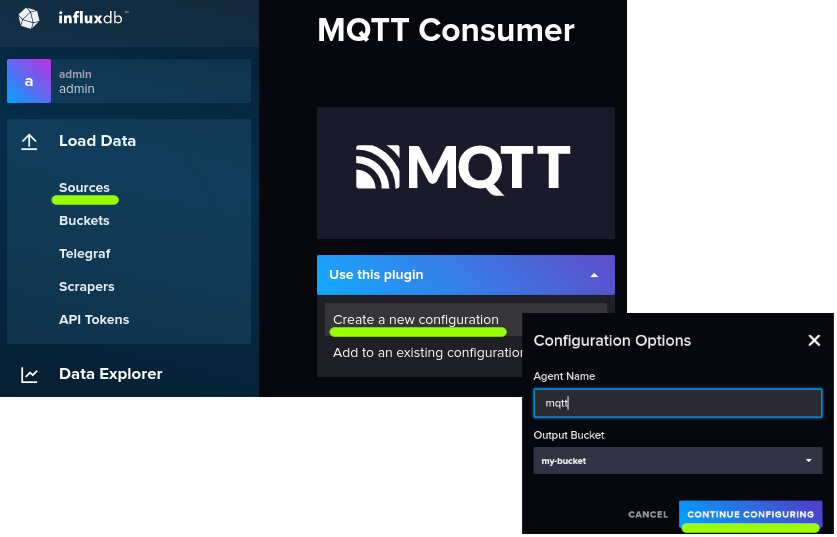

Copy this token and save it to the telegraf step.
MQTT Service
mqtt
1 |
|
password
1 |
|
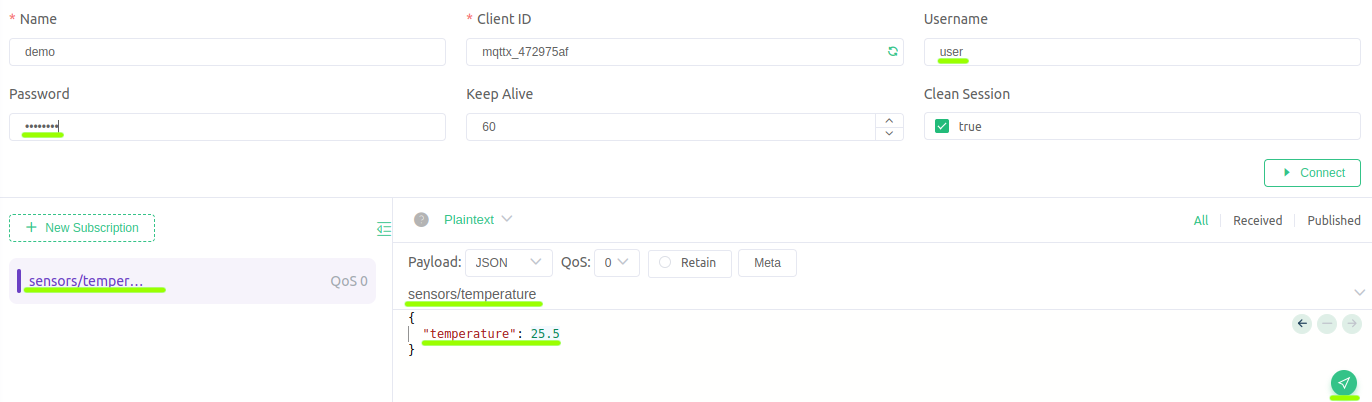
This service will listen at port 1883 and expect MQTT packets and also listen at port 9001 and expect HTTP/Websocket protocol. To secure the access to these ports the allow_anonymous is set to false. So, it will be necessary to set an user and password to access. The following password.txt file represents an access for the account:
user: user
password: password
If you want you can replace the user password using the following command:
sudo docker-compose exec mosquitto mosquitto_passwd -b /mosquitto/config/password.txt user password
In production, you should use certificates to encrypt the data and to authenticate.
Telegraf Service
telegraf
1 |
|
This configuration enables the Telegraf MQTT plugin. It will work as a consumer that reads from the specific MQTT topic (sensors/#) and creates metrics based on the input data (with json format). Finally, this data will be written to InfluxDB. However, you will need to replace the token with the one that you generated in the InfluxDB Service step.
Test
If you follow all the steps correctly you should be able to test this setup as described below:
Using emqx.io as a HTTP/Websocket publisher:
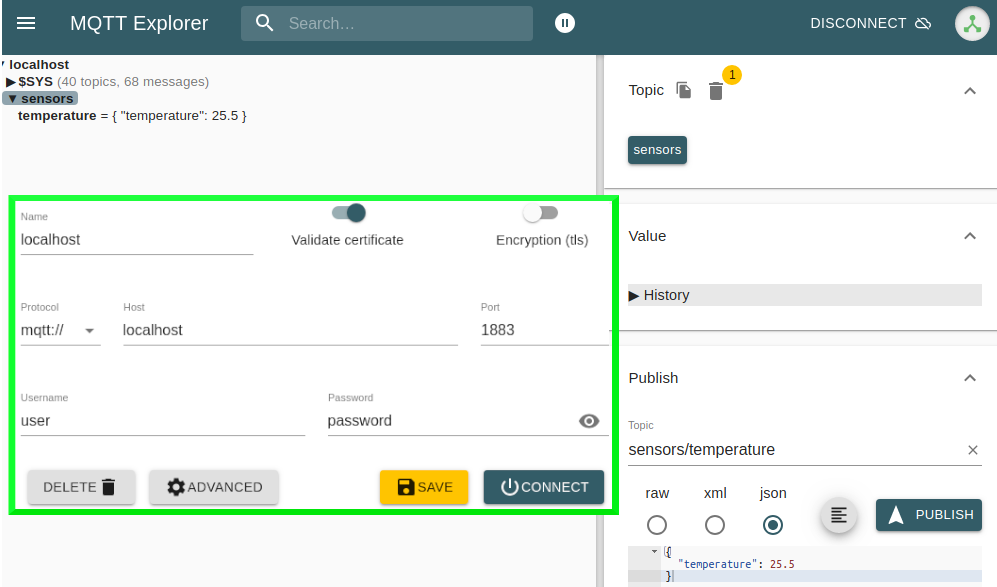
 Using MQTT Explorer as a MQTT publisher:
 Finally you should see in InfluxDB the data that you inserted:

